


Learn Advanced Success Hair Braiding for Better Results
Master Precision Sectioning and Parting Techniques
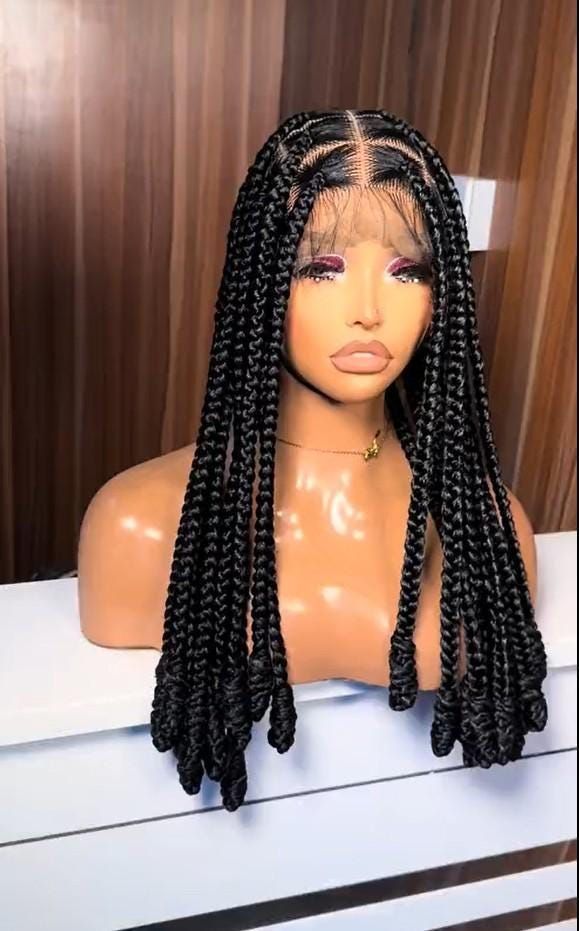
Advanced braiding demands flawless sectioning. Use a tail comb to create geometric parts: straight grids for box braids, curved crescents for goddess https://www.successhairbraidingmd.com/ braids, or zigzag lines for creative updos. Clip away unworked hair with sectioning clips, not regular hair clips that snag. The size of each section determines braid thickness and durability. For medium braids, take 1-inch squares; for micro braids, half-inch or smaller. Spray sections lightly with water or braid spray to increase grip. Practice the “fan sectioning” method for cornrows: divide the scalp like a honeycomb for seamless direction changes. Precision parts prevent loose flyaways and make your finished style look professionally installed.
Perfect the Knotless Braid Technique
Knotless braids reduce tension and create a natural, flat appearance. Instead of knotting extension hair at the root, feed small amounts of extension hair into your natural hair gradually. Start with a three-strand plait using only your real hair for the first half-inch. Then add a thin strip of extension to one strand, continue braiding another half-inch, then add more extension to another strand. Repeat until all extension hair is incorporated. The result has no bulky knot, lies flat against the scalp, and distributes weight evenly. Practice this technique on a mannequin head or friend before trying on yourself. Knotless braids last four to six weeks but cause significantly less edge breakage than traditional box braids.
Incorporate Reverse and Dutch Braiding Methods
Advanced stylists combine multiple braiding directions for unique textures. Dutch braiding (inverted French braid) crosses sections under instead of over, creating a raised 3D effect. Reverse dutch braiding goes under again for a rope-like twist. Learn the “ladder braid” by picking up small horizontal pieces from the sides while moving upward. For a herringbone pattern, alternate between overhand and underhand crossing each time you add hair. These techniques allow you to create basket weave designs, crown braids, and intricate updos without extra extensions. Practice each method slowly until your hands memorize the motion. Use a small mirror behind you to check your part lines and crossover consistency.
Apply Professional Finishing and Sealing Methods
Advanced braiding isn’t complete without proper finishing. Seal the ends of synthetic braids by dipping the last inch into nearly boiling water for five seconds, then shaping them into curls or straight tips. For human hair braids, use a lighter to gently melt the tips (only for heat-safe fibers). Apply a thin layer of edge control gel with a toothbrush to smooth baby hairs into swoops or curls. Use a hooded dryer on low heat for ten minutes to set the style. For glossy results, spray a lightweight sheen spray from 12 inches away. Avoid heavy oils that attract dust. Professional finishing makes your braids last longer and look salon-fresh for weeks without constant retouching.
Troubleshoot Common Advanced Braiding Problems
Even skilled braiders face challenges. Slippage happens when hair is too silky: add a texturizing spray or dry shampoo before braiding. Uneven thickness results from inconsistent section sizes: use a measuring comb or color-coded clips to mark sections. Bulging at the root occurs when you add extension hair too quickly: practice the gradual feed method. Frizzing after one week means your braids are too loose: braid with slightly more tension on the extensions. Headaches signal too much weight: remove some extensions or switch to smaller braids. Keep a notebook of each client’s or your own hair density, preferred tension, and style durability to improve results with every session.